Hello all! Happy winter! I wanted to write a post today to document and detail what I have been working on over my winter break from school! As I had briefly mentioned in my October Update, I am currently working on a Vertical Slice of a horror game, which is now confidently titled The Wicker. I have been working on this side project with 1 other developer since October, and we are approaching the final sprint of our development. I have worked as the only Engineer and have worked together with my partner (Alan Karbachinsky) on the design of this game. Additionally, we have been working with a composer, Zoe Morfas, to provide music and SFX for our highly sound centric design.
The Wicker is played on the Mouse and Keyboard, and experiments with using abstract environmental feedback as a means of communicating game state to the player. The experience goal of this game is to make the player feel as though they are attempting to solve a puzzle with a blindfold. A dark and constantly unsettled abstract arena is accompanied by another entity’s looming presence, causing discomfort and fear. Additionally, we hope to instill uneasiness in players through interpretation & understanding of environmental factors. Below, I would like to breakdown some of the nuances and highlights (in my personal opinion) of the design of my WIP game, The Wicker.
Overview
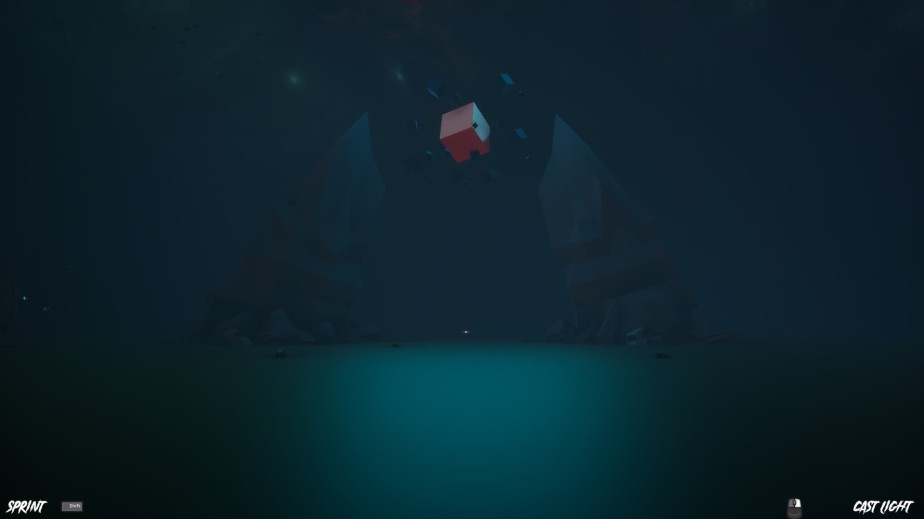
Players are spawned into a 3 dimensional environment, surrounded by suspended and spinning cubes (shown above). Players can walk through these suspended cubes, which disappear upon contact, but the player is slown down by this. The environment is dark, and players hear a constant ambiance “drone” (which is being played through a low pass). Players use general WASD movement and First Person mouse input to move and turn. Holding shift allows players to sprint, endlessly, but they are slowed to the same speed upon walking into a cube. Using the mechanics here and below, players are tasked with finding the seer eye, and delivering it to the socket. Both of these objectives are hidden in the game arena, which takes a sprinting player about 45 seconds to traverse along the x axis, and 25 along the y axis.
The Game Loop:

The “30 Second Test” Loop:

Mechanics
Create Tunnel – Left Click: Casts forth a conjured wall from the player, in the facing direction. This wall removes all suspended cubes it comes into majority contact with. This is used by players to create pathways down which they can move, unhindered by the slowing effect of the cubes. This wall moves much quicker than the player. This ability is on a 5 second cooldown.
Cast Light – Right Click: Casts forth a light orb from the player, in the facing direction. This light orb provides some light as it moves through the air, but upon contact with a cube it will turn that cube into a light cube, greatly illuminating the surrounding area. This light orb moves only slightly quicker than the player’s sprint speed, and will expire after 7 seconds uncontacted. This ability is on a 7 second cooldown.
Connect with Objective – Mouse Input: To understand where the current objective is located, players must use their mouse to look in a full circle, and proceed in the direction indicated by both an audio stimulus (low pass filter removed from the ambiance drone) and a UI indicator (a music note in the bottom right hand corner). This mechanic is a simple collider on the objective and raycast from the player forward, but I have attempted to utilize the affordances of this schematic to our advantage. The Objective (which has the collider on it) is programmed to manipulate the size of the collider, as well as just outright disable it for brief moments. This dynamicity adds a nice touch of uneasiness in one of our core mechanics. An example of this in action would be if a player is pursuing the direction in which they receive the auditory & visual cures, this is because their raycast is hitting the objective collider. but as they pursue that direction, their raycast may lose contact with the collider, causing their cues to cut out, and forcing them to realign to the movement of the objective collider. This mechanic is something I worked a lot on in the beginning of production, and I feel has turned out very fun. I was BEYOND excited to see an extremely similar (pretty much identical(and much more polished)) mechanic present in Spider Man: Miles Morales, released a few weeks ago (The Sound Sample minigame located throughout the map).
The Spirit
Players are being pursued. The spirit AI is trying to stop the player from bringing the eye to the socket, and although the AI itself is a simple navigation mesh agent, I have tried to create complexity through the affordances of such a style of pursuit. For those unfamiliar, nav-mesh agents are given a destination, and will pursue at a set speed, along specified meshes. In The Wicker, this destination is set every frame to be the player’s current location. However, since the player spends a majority of their time moving, this often leads to the AI approaching the player from behind. This was something we didn’t want, as we thought the player should always be able to witness the spirit…. atleast a little. Instead, I began to view the nav-mesh agent component of the enemy as more of a dynamic timer: in a constant pursuit of the player, at a manipulated speed, but with the mesh renderer disabled entirely, and just counting down until it will trigger an actual enemy encounter. This count down is dynamic because it is affected by the player’s movement. In more plain terms: The nav-mesh agent has no visual representation while it is in pursuit of the player. The enemy is simply an invisible collider in pursuit of the player… however, once this AI reaches the player, this begins what we have dubbed the encounter sequence, which is where the player will actually run the risk of being dragged to their death by the spirit.
Encounter Sequences
Once the invisible nav mesh agent has reached the player’s position, 1 of 2 things can happen.
The first thing: The AI is teleported to 1 of 5 positions in front of the player, and an encounter begins. The encounter is indicated by an audio cue (screams), an environmental cue (change of color of light cubes and directional light), a “juice” cue (camera shake), and then of course the appearance of the enemy. The enemy’s mesh renderer becomes enabled during an encounter sequence, and the enemy is now pursuing the player head on. The teleport locations are relative to the player’s position & rotation, and are at such a distance from the player that the enemy spawning is un-rendered by the player camera. Additionally, there is a slight (purposeful) delay between the enemy appearing and the cues listed above^. This is done to help time-up the player & AI’s encounter with the mood shift of the level, while still indicating to the player that they are in immediate danger. This style of encounter ends when either the player creates enough distance between themselves and the AI, or the AI catches the player. This sequence can also be escaped by placing the eye in the socket, and thus winning the game.
The second thing that can happen is the AI “fakes out” the player. In an effort to create the mood of uneasiness, I added this style of encounter which has the same probability as all other encounters (specifically the AI is either teleported to 1 of the 5 positions above, or sent into this “fake out” sequence). In the fake out sequence, the enemy is first made visible far out in front of of the player. This is where the “encounter” cues are enabled, all the same as the above encounter type, but with the use of a specific audio. The AI’s position is then lerped from there to directly in front of the player. Right before it runs through the player, the enemy vanishes, a low pass filter is applied to the specified audio, and the bot is teleported to it’s spawn location. Then the encounter sequence ends (the AI becomes invisible and all encounter indicators are disabled).
Here I’d like to share the progression of the “fake out” in a few gifs.. Please ignore T-pose, still in development! Top: Experimenting with working a “fake” encounter into my existing system. Middle: Added position lerp and environmental reaction. Bottom: Added a new shader meant to conceal the unrealistic movement of a direct position lerp.
Movement
To avoid the simplicity of the generic nav mesh agent pursuit, I created a unique movement scheme meant to give the agent a more frightful approach (in one of the normal encounters). So, just to clarify, while the enemy AI is invisible (and essentially a dynamic timer), this movement scheme is NOT being used. This movement solution is only for when an actual encounter (non fake out) begins. The first thing I did was give the AI 6 children locations (which move relative to the AI’s position) that it could choose to move to. All are in front of the AI (aka the direction it is heading), with 3 to the AI’s left and then 3 mirrored on it’s right. Then, I placed the AI’s movement in a thread where, upon reaching a set time interval, it will teleport itself to one of the nearby child locations, randomly. This worked well, and was very promising with how unsettling the movement felt, but it was still rusty and missing something.
To try and mask the obvious teleporting of position, created a second thread within the initial one mentioned above. This thread will be called once per movement interval, and essentially applies 1 of the 3 shaders we have for our enemy, randomly. Our enemy shader is brilliant, and the only thing in this game we have not produced ourselves. All credit to Inan Evin on the Unity Asset Store. This “glitch” shader proved to be very customizable, and we were easily able to transform them into proper “horror” material. Adding these shaders into the movement quickly made the movement more fear inciting, as well as masked up the “transitions” in the movement scheme I had built. Here’s a gif of it all put together!
Abstract Environmental Feedback in The Wicker
One of the core features of The Wicker that I have not yet touched on is the significance of the spinning cubes. This is one of the many things in our environment which we are trying to use to communicate the game state to the player. With The Wicker, we set out to toe the line of how little information we would directly be giving to the player for them to understand our complex game. This has proven an immense task in design, but one of the ways we chose to address this was using the environment to communicate with the player. The ways in which we have chosen to do this are all in pursuit of an visual aesthetic goal of minimalism, and other worldly-ness, and “play feel” aesthetic of curiosity & fulfillment, relying heavily on pattern recognition, and all with a tone of horror, of course!
The spinning cubes, and more specifically the speed at which the cubes rotate represents how close the enemy AI is to the player IN ALL STATES. So even while the AI is invisible, and a dynamic timer, the cubes are still spinning relative to how close the AI is to the player’s position (with SODA I’m sure you see how this is so easy). Managing literally thousands of cubes is no small task, and I opted out of using ECS. So all of the managing of my cubes comes down to rigorous abstraction from cube, to individual “storm unit” (around 90 cubes), and then to a storm manager. The storm manager controls which cubes are rendered (once again relative to players location(SODA, DUDE!)). The storm manager also dishes out the tick to each individual storm unit, which then rotates each cube accordingly. The spinning of the cubes set out to do 2 things: Tell the player about their position relative to AI and incite an uneasiness/faster pace while the AI is near.
The lights in The Wicker are another facet through which we try to communicate the game state to the player. As can be seen in many of the gifs above, the default lighting color of all lights in the game is either a bright purple(player spawn light), or a purplish-pink(lights cast by player). However, upon an enemy encounter, all lights in the scene are changed to a deep red for the duration of the encounter. This, in turn, not only signals to the player the beginning of an encounter, but the end to one as well. This feature of the lights is what adds the most value to the “Cast Light” mechanic. Ideally, players are using their lights throughout the duration of the game, and by placing them throughout the arena they are able to better understand the state of their encounter. In addition to turning the light cubes color, other environmental lights are also signaled on the event of an encounter, and switch to the same deep red. This includes the spawn light and the directional light.
The ambiance is another extremely important indicator to the player. While the player is faced away from the current objective, the ambiance audio (a mild drone and occasional chirps) is played under a low pass audio filter. However, when the player is facing the current objective, the frequency cutoff of the low pass is disabled, creating a noticeable jump in audio, which is also synced up with a UI indication on the player’s screen. In our playtesting, we found that allowing players both the visual and audio cue made it easier to understand that there may be an interest in continuing that direction. Our use of the ambiance in this way has become one of the integral features to one of our core mechanics, “connect with objective”.
Tutorialization of Our Unconventional Game


Right Image: the Hub a few minutes ago.
Note: time is relative.
Up to this point, all I have discussed is what me and my peer consider to be the actual game, however it is not the only part of our experience. In fact, it’s not the front facing part of the experience at all. Players spawn into The Wicker in the “Hub”. This hub is where we have placed all the tutorialization of our game. The Wicker has not been an easy game to teach people… as I’m sure you understand at this point in the post! There is a lot of intended “learn on your own” moments. With that said, we have worked hard to tutorialize in a way that would remain true to our aesthetic goals, and came onto 5 main solutions. Within the hub, players are not pursued, and they interact with the environment to become familiar with their surroundings, before being led to a teleport into the “actual” game.
Interactable environmental “signs” in the hub, which host pop-up text, are an extremely effective way of communicating a LOT of information while remaining within an extremely realistic scope. Through a simple event based prefab, multiple of these were placed around the hub. To stay to the intended aesthetic, the text is carefully written, and my teammate has modeled an awesome “obelisk” with etchings on the side, which are tied to the interactable text pop-up. These give our hub some visual depth, as well as a platform from which we can communicate necessary tutorial information to the player’s who seek to complete the experience.
Scrolling mechanic explanation HUDs at the bottom of the screen, which are only present while in the hub, have become a useful tool for us. We use this “scrolling text” (4 tips which alternate in 5 second intervals of being displayed at the bottom of the screen) as an opportunity to explain the core mechanics of our game, as well as delineate the Hub area from the main game. When players enter the “actual” game, this UI disappears completely, but reappears as soon as the player is back in the hub. This is meant to create a more “tutorial” representation of the hub in the player’s mind, and separate it from the actual experience.
The eye and socket serves 2 great purposes. Firstly, it allows players to interact with the eye & socket mechanism, which helps create familiarity when they encounter it in the “actual” game. Secondly, once the player places the eye in the hub socket, a light appears and leads them towards a bright light in the distance. Upon approaching that light, players hear a “drone” noise getting louder and louder. As the players walk into the blindingly bright light, the noise now begins to gain heavy bass (as a low pass filter is lifted). Just as the noise reaches max volume and weight, it cuts completely silent. The screen remains blinded by light, but the player has actually been teleported out of the hub, and into the main game arena for the beginning of the game.
A splash screen was good enough for Start Wars, so it’s good enough for us. By splash screen I mean at the beginning of the game, when the player enters from the menu, a chunk of text pops up on their screen. The text is meant to heavily adhere to our aesthetic, but beneath the cryptic language it depicts the general goal of the game. Bring the seer eye to the socket. Additionally, having this text upon entry into the game helps to set the narrative tone of the game.
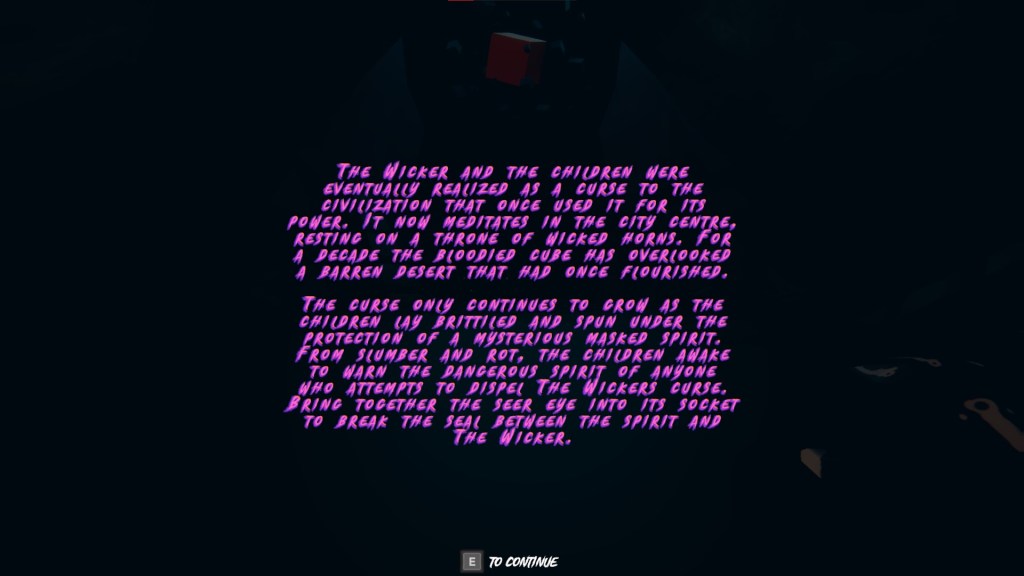
A comprehensive narrative direction is foundational to all the other solutions listed above, as it helps us adhere completely to our aesthetic goals, and create an equally unsettling and intriguing experience for the player. Additionally, writing some background on the world in which The Wicker takes place has helped give us a narrative voice through which we can use to communicate with the player, while staying true to our aesthetic goals.
Final Thoughts
The Wicker has been a real amazing game to work on. I have enjoyed both the engineering and design side of the project, and am excited to see it finally taking a form which is more true to our expectations for the project. As I mentioned above, we are entering the final sprint in this coming week, and plan to have a “release candidate” build probably sooner than that 2 week sprint ends. I will absolutely be posting the itch link here, and it will of course be free. I’d like to leave you, for now, with a gameplay video! This will hopefully be good reference for understanding all the audio mentioned above. Thanks for reading, and have a great day!